The Best Way To Granny Square
By "ultimate" granny square I mean "one-giant-granny-square-to-simplify-my-life" granny square. It has got to be the smartest way to granny square (and yes, it's a verb in my world) because it means zero chance of having 534 granny squares with slightly different dimensions that inevitably would have driven me crazy (right, Ev? haha), consequently leading to a failed project and resentment towards all things granny square. I simply avoided all that negativity by following this pattern by Lion Brand Yarns that Steph from All About Ami found (she also has a detailed, step-by-step blog post!). Maybe one day I will attempt piecing together a billion squares to make up a blanket or throw....but I'm good for now (:

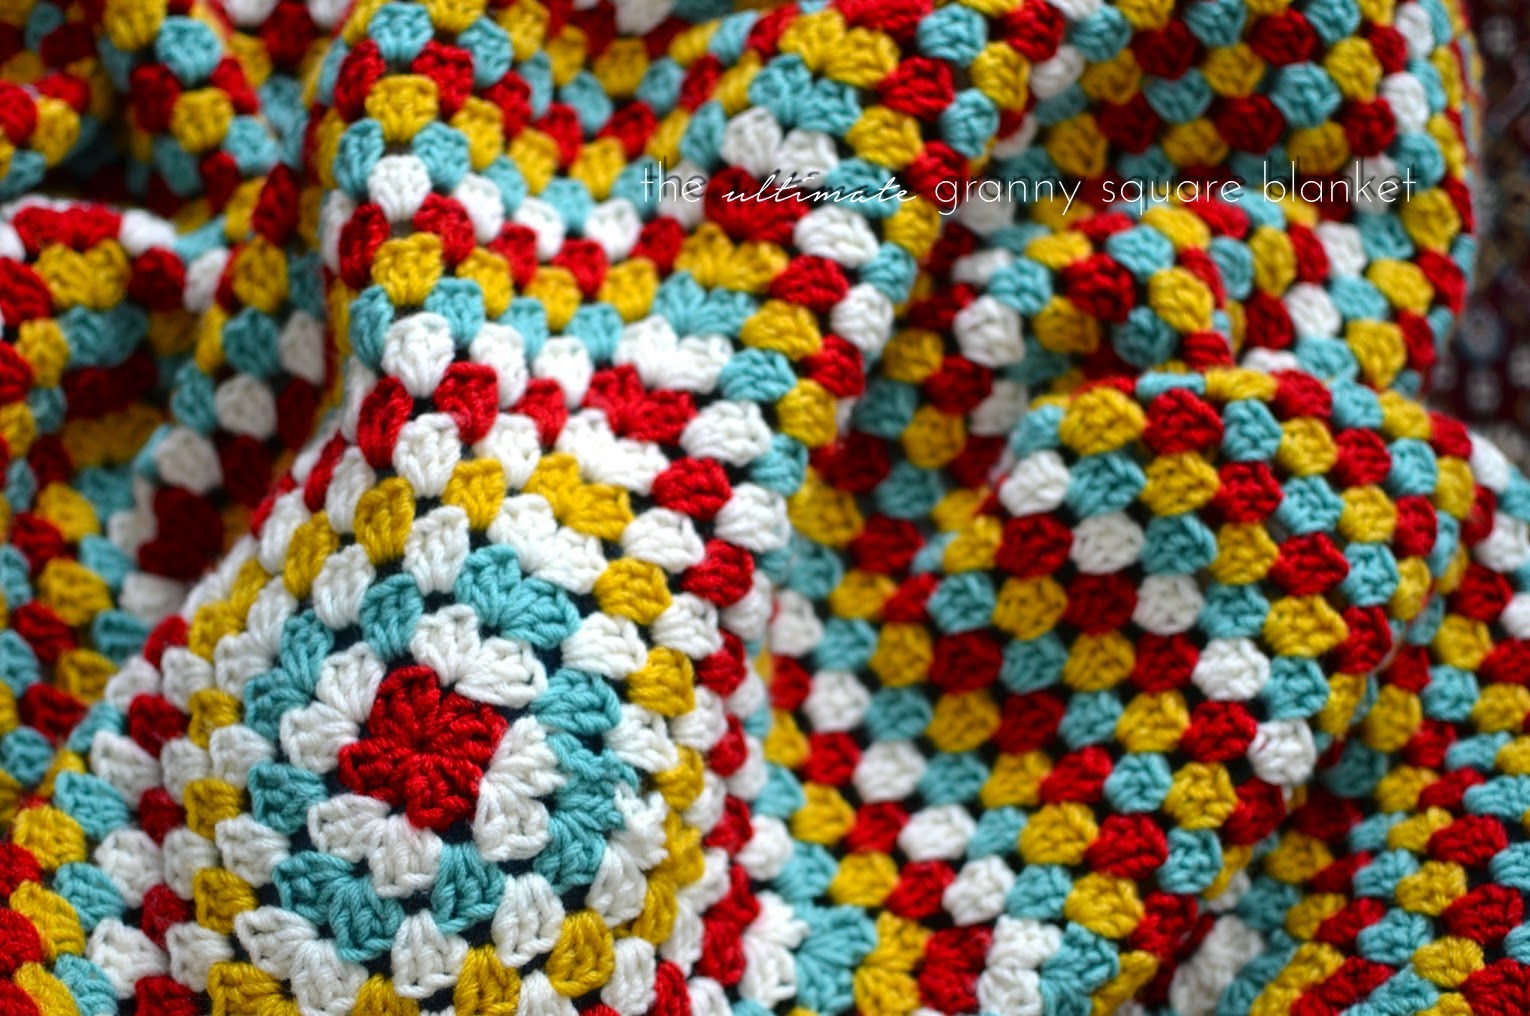
Inspired by this colour palette, I started crocheting this granny square blanket in January 2013 with my new home with my husband in mind. Thanks to my procrastination, the blanket was finished more than a year after our wedding and mere months before our move to our new house (while my favourite crochet partner finished hers within the same season)! Oi vey. In my second blog post, I talked about my bad habit of leaving projects unfinished; this is my last crochet project on that list of items that I started and soon neglected so, yay for that!

The best part about this blanket is that it's easy to personalize it for whoever or wherever you're making it for by simply changing up the colour combination and/or order of the colours!

And it isn't too bulky, but very warm (:

I love how the corners look; all aligned and symmetrical.
Inspired by this colour palette, I started crocheting this granny square blanket in January 2013 with my new home with my husband in mind. Thanks to my procrastination, the blanket was finished more than a year after our wedding and mere months before our move to our new house (while my favourite crochet partner finished hers within the same season)! Oi vey. In my second blog post, I talked about my bad habit of leaving projects unfinished; this is my last crochet project on that list of items that I started and soon neglected so, yay for that!
The best part about this blanket is that it's easy to personalize it for whoever or wherever you're making it for by simply changing up the colour combination and/or order of the colours!
And it isn't too bulky, but very warm (:
I love how the corners look; all aligned and symmetrical.

The silver lining of crochet/knit projects that drag out over an obscene amount of time is that it has a memory attached to the time I was working on it. This blanket was started at one of many Monday night crochet + TV + girl-talk-therapy-sessions with Mandy, who I didn't know too well before but has now become one of my closest and dearest friends.
The Ultimate Granny Square Blanket adapted from this free pattern by Lion Brand Yarns
SUPPLIES
- 5.50mm crochet hook
- Scissors
- Worsted yarn in desired colours
- Colour A: Waverly in Tibetan Red by Lion Brand Yarns
- Colour B: Bernat Super Value in Natural
- Colour C: Impeccable Big! Worsted Solid in Aqua Turquoise by Loops & Threads (I'm not 100% sure about this colour as I didn't write it down)
- Colour D: Vanna's Choice in Mustard by Lion Brand Yarns
DIMENSIONS
- 54 x 54 inches
NOTES
- This pattern is worked in a round from the centre to outer edge.
- When switching colours, crochet over the tail of the previous colour to avoid having to weave them in later. I like to tie a knot around a stitch in the middle of the tail's length to secure it and continue crocheting over the remainder of the tail.
- When switching colours, be sure to join at a ch 1 space (ie. corners of each granny square) versus the space between the groups of 3dc-ch1-3dc.
- I use dc sp to refer to the space between the groups of 3dc-ch1-3dc.
- The Lion Brand pattern says to slip stitch in rounds 3 and 4 but I prefer not to in order to get a cleaner and more consistent look each round.
COLOUR SEQUENCE (see last photo above)
- A - B - C - B - D - B - A - B - { C-D-A } - B - { } x2 - B - { } x3 - B - { } x4 - B
PATTERN
| 1 |
Using colour A, make a magic circle.
|
| 2 |
Continuing with colour A: ch 3, 2 dc in ring, ch 1. { 3 dc in ring, ch 1 }. Repeat { } twice more then sl st to top (third chain) of ch 3. Tighten magic circle and fasten off.
|
| 3 |
Switch to colour B by joining in any ch 1 sp. Ch 3, [2 dc, ch 1, 3 dc] into same sp. { 3 dc, ch1, 3 dc } into next ch 1 sp. Repeat into the two remaining ch 1 sp. Sl st to top of first ch 3.
|
| 4 | Switch to colour C by joining in any ch 1 sp. Ch 3, [2 dc, ch 1, 3 dc] into same sp. { 3 dc into dc sp from previous row. [3 dc, ch 1, 3 dc] into next ch 1 sp }. Repeat { } two more times, then 3 dc in dc sp and sl st into top of first ch 3. |
*By now you should be able to recognize the growing granny square. Yay! Repeat step 4 in your desired colour sequence, increasing by one 3 dc per side of granny square in each round (ie. between each set of corners/3dc-ch1-3dc sequence) which means you will increase by four 3 dc per round. | |
5
|
Continuing with colour B, loosely sc into each st. Fasten off and weave in all ends.
|


Comments
Post a Comment